RMS Installation Guide
General Requirements
1. Apache Web Server 1.3 or higher with mod_rewrite enabled;
- PHP 5.6 - 7.3
- functions enabled: exec(); ini_set();
- modules: curl; mysql; mysqli;
- mysql.allow_persistent = On
- mysql.max_persistent = unlimited
- mysqli.allow_persistent = On
- mysqli.max_persistent = unlimited
- zlib;
- constants: allow_url_fopen=true; safe_mode=false;
- directives: memory_limit = 128MB or more; max_execution_time = 60 or more; ability to run PHP via CLI.
- max_input_time 60
- post_max_size 64M
- max_file_uploads 128
- upload_max_filesize 128M
2. MySQL database server 5.0 or higher with ALTER Privileges.
with timeouts:
- interactive_timeout = 300 or more;
- wait_timeout = 300 or more;
- max_allowed_packet = 128M or more;
3. HD space usage: 1GB in standard configuration;
Having shell-access to your server is recommended but not necessary.
We recommend using Hetzner VPS on (hetzner.com/cloud - CX11 or better) for about $5/month, with a free Vesta control panel (vestacp.com ).
Installing RMS
Preparation
- Register a new affiliate account at https://rms.postaffiliatepro.com/
- Download RMS
Installation
- Unzip the downloaded archive and copy the files to the directory where you are installing the shop. If you're installing into a subdirectory make sure to edit the .htaccess file so it has the name of the subdirectory. For instance, if you're installing into http://www.site.com/shop you should edit .htaccess and change RewriteBase/ to RewriteBase/shop
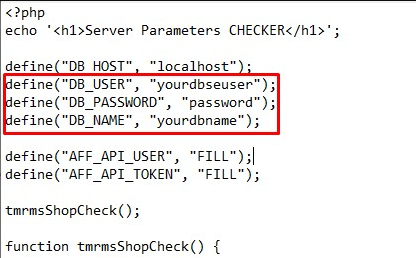
- Please check your server parameters before installing RMS. To do that find the rms_check.php file among the rms files you downloaded and make sure to add your database in these fields:
In your browser enter your RMS shop URL and add /rms_check.php
If all the fields are green - you are ok to go on with the installation. Here’s how it has to look - https://rms.templates.com/rms_check.php
If some parameters are red - you need to change the values of those parameters. If you don’t know how, please ask your hosting tech support to help.
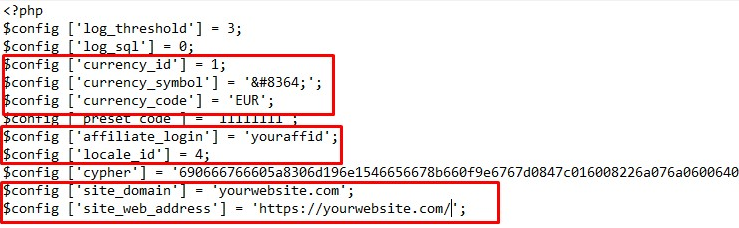
- Go to data>config and edit the config.php file to add your aff id, shopping cart language (locale_id) and currency. Also add your website domain and address as shown below:
!! Please use the referral id in the affiliate_login line, not your email address. Your referral id can be found here
- Create a new empty database on the server to store the RMS data.
- If you have shell-access to your server, launch the 'diagnostics.php' command. It will do the diagnostics, check the configuration and report errors (if any). Most often, errors occur due to the files/directories permissions set incorrectly. In case the files permission is the problem, the diagnostics also delivers the list of the commands to set the needed files permission when executed from the command line. Mostly you will need to change the permission for files in root directory of your shop to "0644"
If you have no shell-access to your server you should set “0777” permission for the data/logs and data/template_c directories.
- In your browser field enter your RMS shop URL and add index.php/install It should be noted that “/install” is not the store file or folder but just a virtual directory to proceed with the shop installation, so the shop archive does not contain it.
So in the browser you enter the URL as http://www.site.com/index.php/install
or
http://www.site.com/shop/index.php/install (if you're installing into a subdirectory).
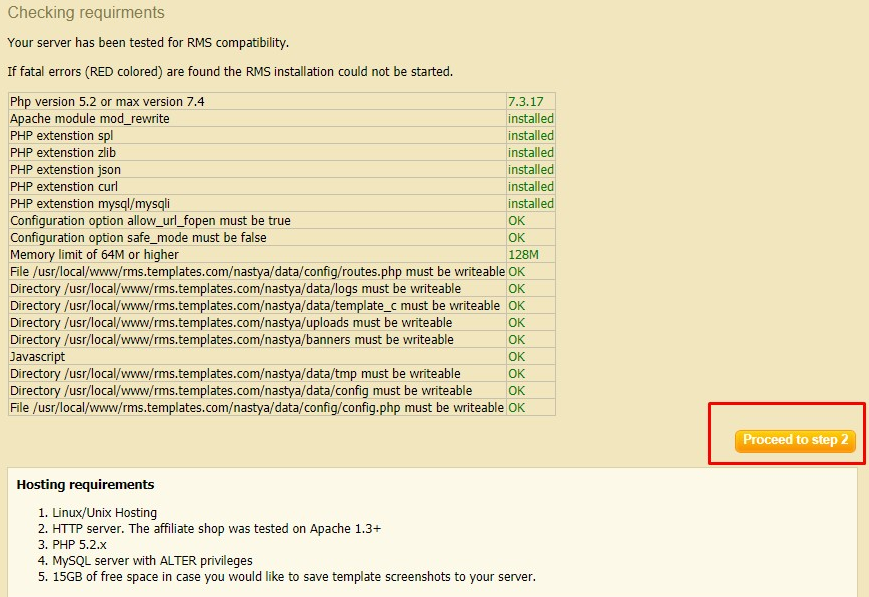
- From the browser you are taken to the 'Checking requirements' step.
In this step you get tests that your run-time environment should match before you proceed installing. They are actually the same tests as in diagnostics with the difference that diagnostics can be accessed via the command line only.
- Once the testing is passed successfully there shows a page with the 'Proceed to Step 2' button and the shop parameters displayed in green (if OK). In case there are errors they are either displayed in red, or you get an 'Under Construction' page instead. If this occurs please check the rms_check.php file agan and change inappropriate parameters according to the requirements specified in the very beginning of this guide, or ask your hosting administrator to change them if possible.
- Press "Proceed to step 2".
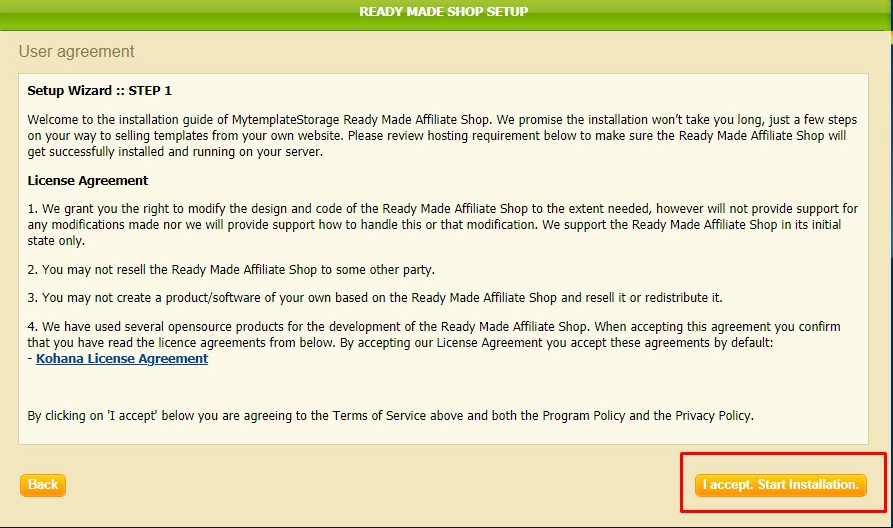
- Please read and confirm you accept the licensing agreement, press 'I accept. Start installation'.
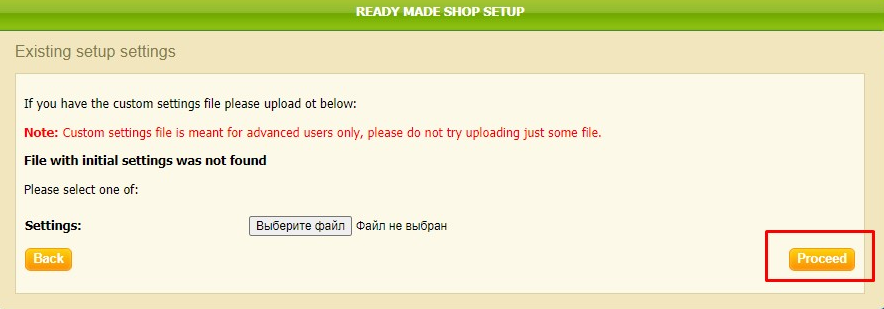
- Press 'Proceed' to skip the 'Existing setup settings' step.
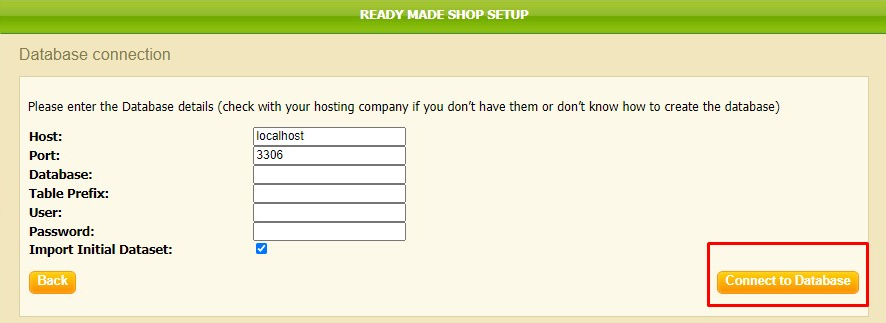
- Database connection. In this step you are supposed to enter the correct parameters to access your database server. To clarify - these are the parameters you set up in step 4. Please, enter:
Host – the database server address (set as 'localhost' by default).
Port – the database service port (set '3306' by default).
Database – the database name (the one you created to be used by the RMS shop).
Table prefix – the table names prefix. If you have only one database then having a prefix enables you to distinguish between the RMS application and other tables. This field is not obligatory.
User and Password – the database username and password.
To proceed and check if the database settings are correct click 'Connect to Database'.
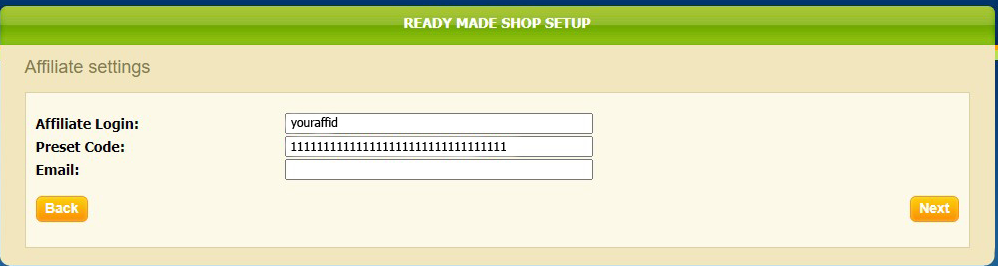
- In 'Affiliate settings' enter your e-mail address. It will be used as the RMS admin e-mail address. You will receive your RMS admin area username and password to this email. Click 'Next' to proceed.
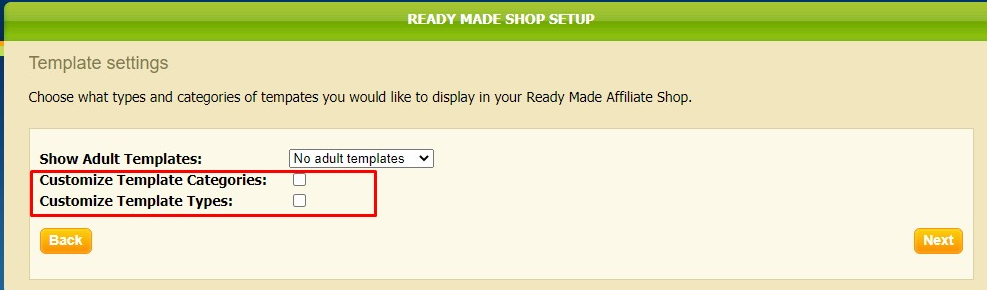
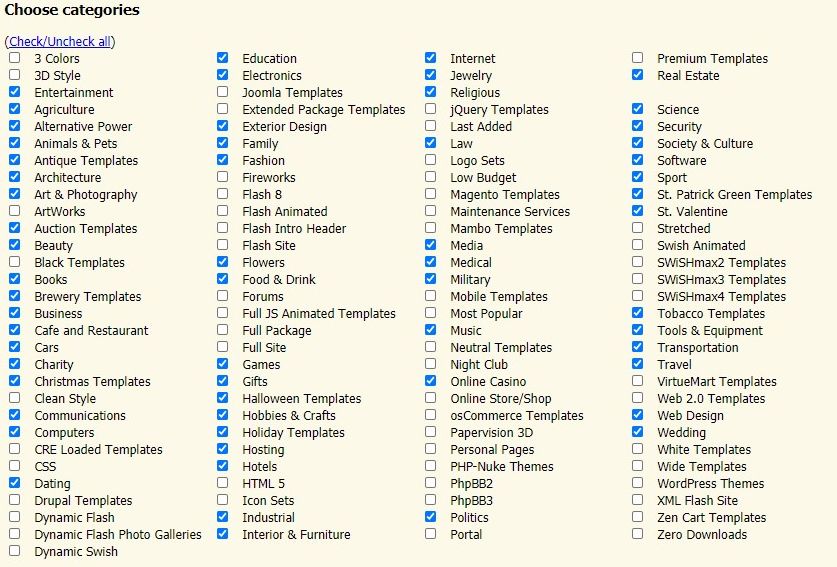
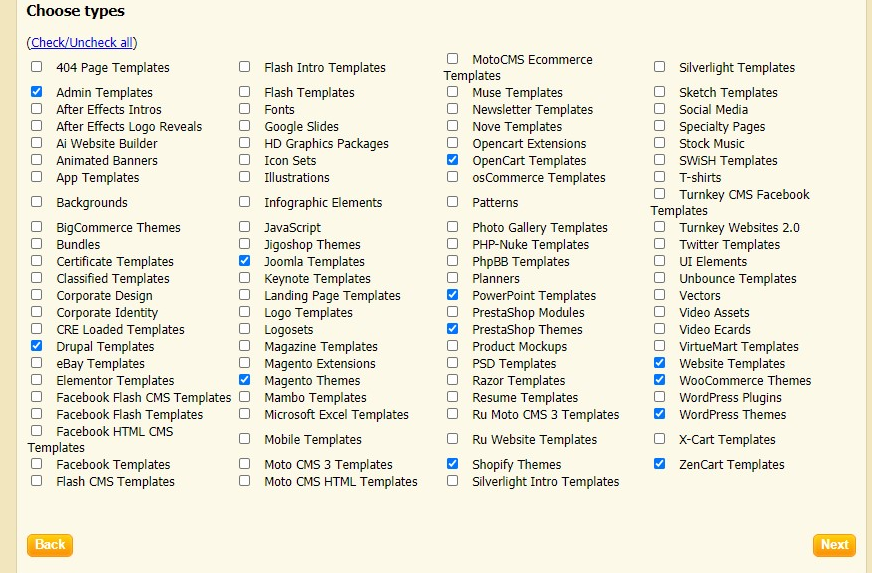
- 'Template settings'. In this step you can select the template types and categories you would like to display in the RMS store. If you choose to display all available templates you can skip it and click 'Next' to proceed.
- Important: if you choose particular template types and categories in this step you will NOT be able to enable their display from the shop admin area once the shop is installed and will need to re-install the shop over again to enable them. So if you're not sure which particular types and categories you would want to display now and may want to change them later - choose all available types and categories display in this step and manage them from the shop admin once the shop is installed.
- We strongly recommend to select following categories:
and types:
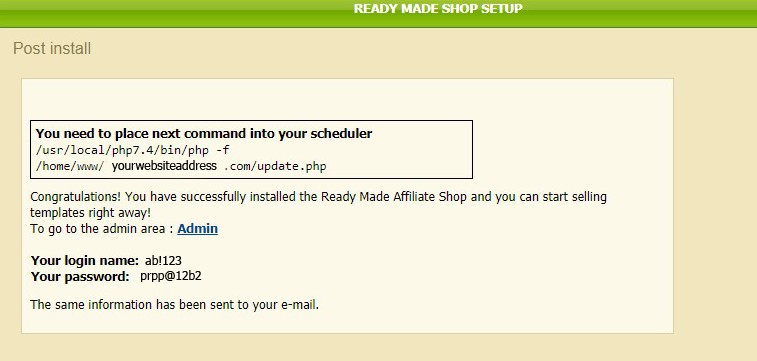
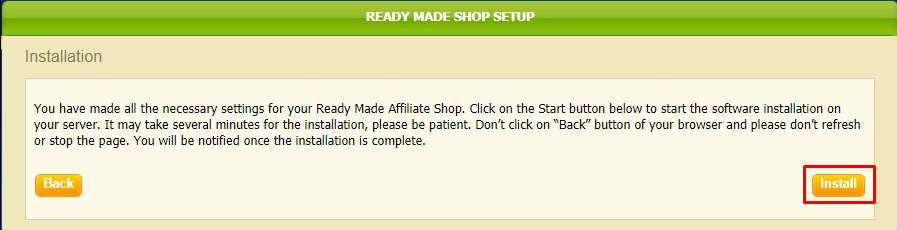
- Installation. In this step you get the final notification before you start installation. When ready, press 'Install'. The installation may take a certain amount of time and it is not recommended to abort it.
- Once the shop is installed you are delivered the RMS update command that is to be added to a cron job or another scheduler on your hosting to run updates (we recommend to run updates daily). <a href="https://youtu.be/leQfX_7JSRg">This video</a> shows how to do that.
You are also delivered the RMS admin access details (username and password):
The just installed shop displays a minimal amount of templates, just to show the shop is installed and working OK. Once updated through the CRON command it displays the rest of the available templates including the newest ones.
Set-up
Now we can proceed to customize your shop.
Implement the settings by following the next steps below. For more info on what your admin area has to offer please refer to the help tab.
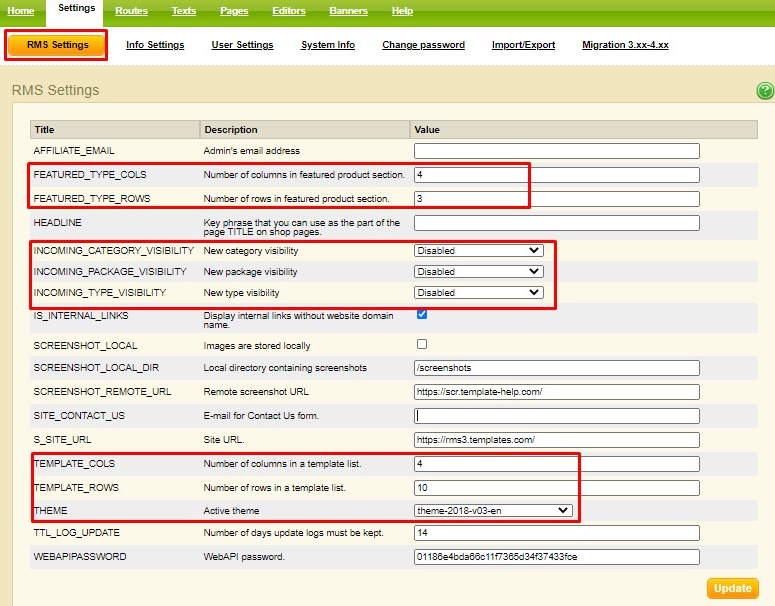
1 Navigate to Settings-> RMS Settings.
- Change the values: FEATURED_TYPE_COLS to 20, FEATURED_TYPE_ROWS to 1.
- Disable INCOMING_CATEGORY_VISIBILITY, INCOMING_PACKAGE_VISIBILITY and INCOMING_TYPE_VISIBILITY.
- Change the values: TEMPLATE_COLS to 4, TEMPLATE_ROWS to 5.
- Press ‘Update’.
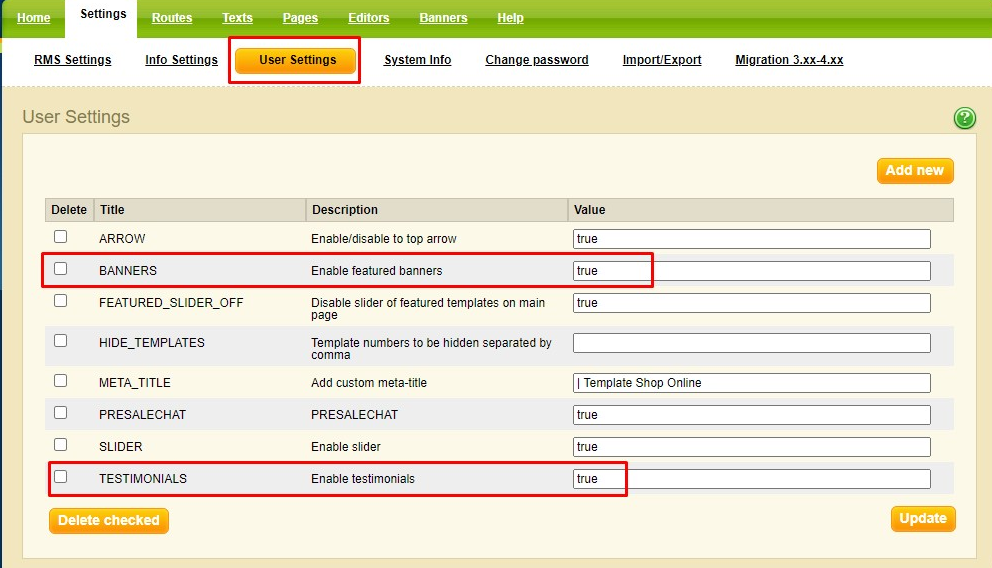
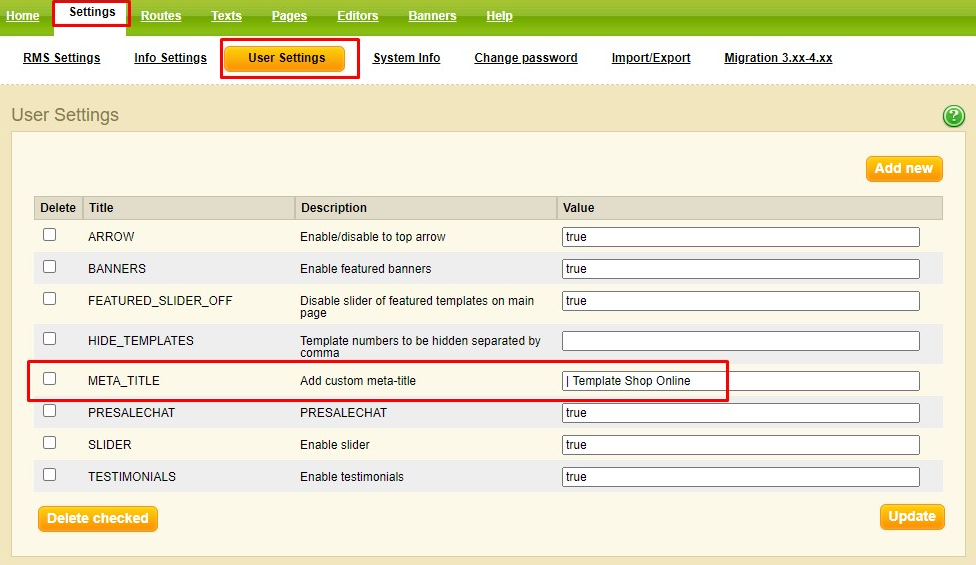
2 Go to Settings -> User Settings. (Example on screenshot below)
- Enable slider (disabled by default): press Add New user setting. Add “SLIDER” to the Name field. Add “Enable slider” to the Description field. Add “true” to the Value field and click Submit. Change the value field to false to disable slider.
- Enable Webstudio (optional): press Add New user setting. Add “WEBSTUDIO” to the Name field. Add “Enable webstudio shop” to the Description field. Add “true” to the Value field for WEB-STUDIO and click Submit.
- Add WebStudio Email (optional): press Add New user setting. Add “WEBSTUDIO_EMAIL” to the Name field. Add “your email the template orders will be delivered to” to the Description field. Add the email you would like the template orders to be delivered to to the Value field. Click Submit.
- Enable/disable presale chat (enabled by default): press Add New user setting. Add “PRESALECHAT” to the Name field. Add “Enable chat” to the Description field. Add “false” to the Value field and click Submit.
- Enable/disable the “UP” button (enabled by default): press Add New user setting. Add “ARROW” to the Name field. Add “Enable/disable to top arrow” to the Description field. Add “false” to the Value field and click Submit.
- Enable/disable Banners and Testimonials. Add “true” (to enable), or “false” (to disable) to the Value field and click Submit.

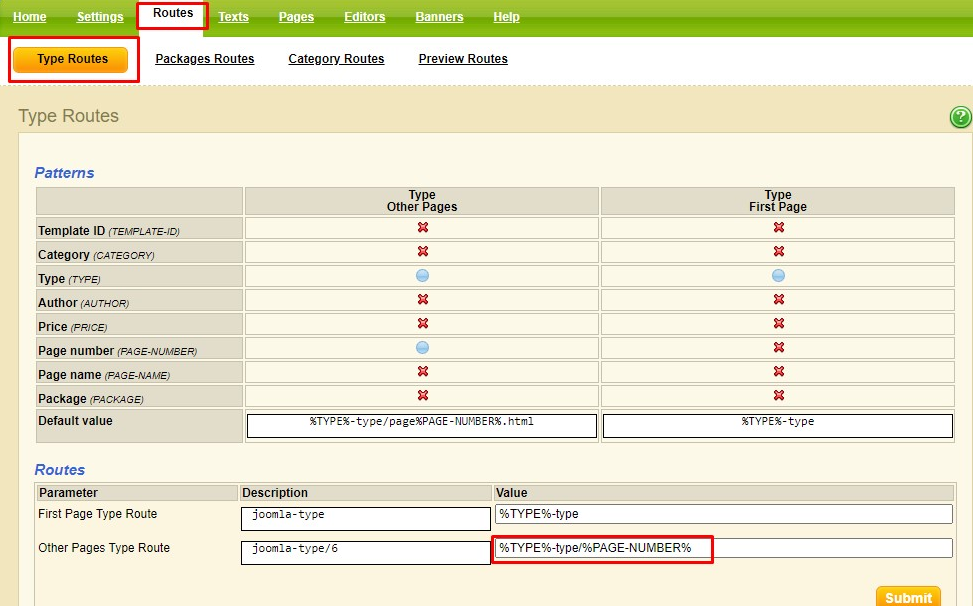
3 Go to Routes -> Type Routes and change the value Other Pages Type Route to:
%TYPE%-type/%PAGE-NUMBER%
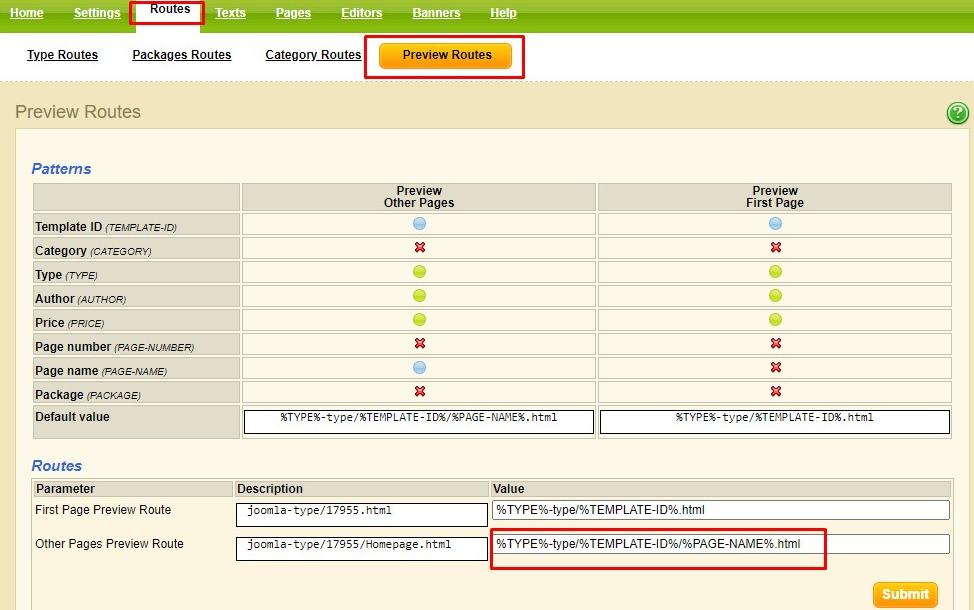
4 Go to Routes -> Preview Routes and change the value Other Pages Preview Route to: %TYPE%-type/%TEMPLATE-ID%-%PAGE-NAME%.html
5 Edit Types/Categories: If you want to hide some types or categories go to Texts -> Types/categories, choose the needed template type/category on the left and change Visibility from Visible to Hidden in the Main Properties section on the right.
To sort types/categories in alphabetical order press the orange triangle on the left and choose “sort in alphabetical order”.
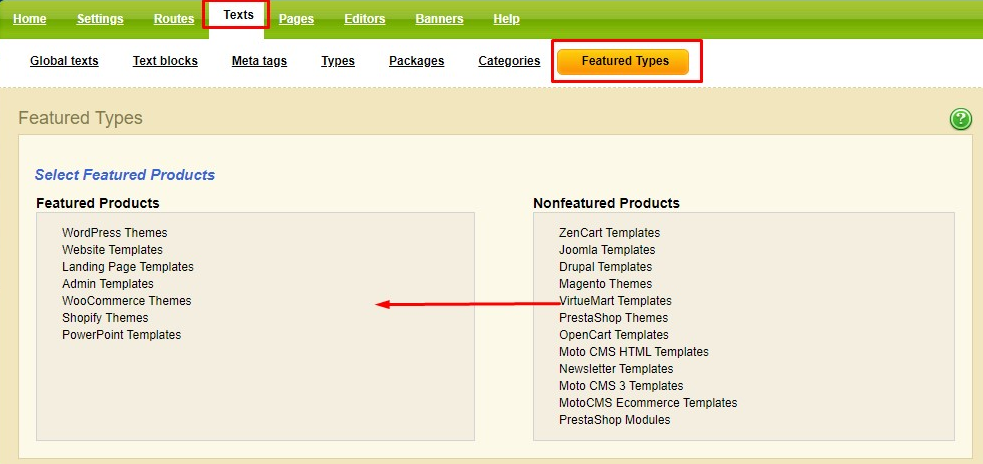
6 Set Featured types: Navigate to Texts -> Featured Types and drag the needed featured types (will be displayed on the home page) to the left column.</p>
7 Change copyright: Go to texts - > Global texts - > Copyright and change the Text content field.
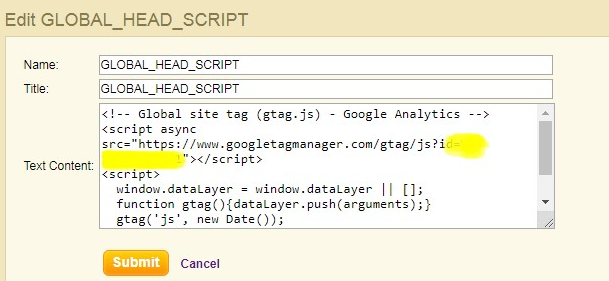
8 Add Google Analytics: Go to texts - > Global texts - > GLOBAL_HEAD_SCRIPT and add the script to the Text content field, make sure to add the Title too:
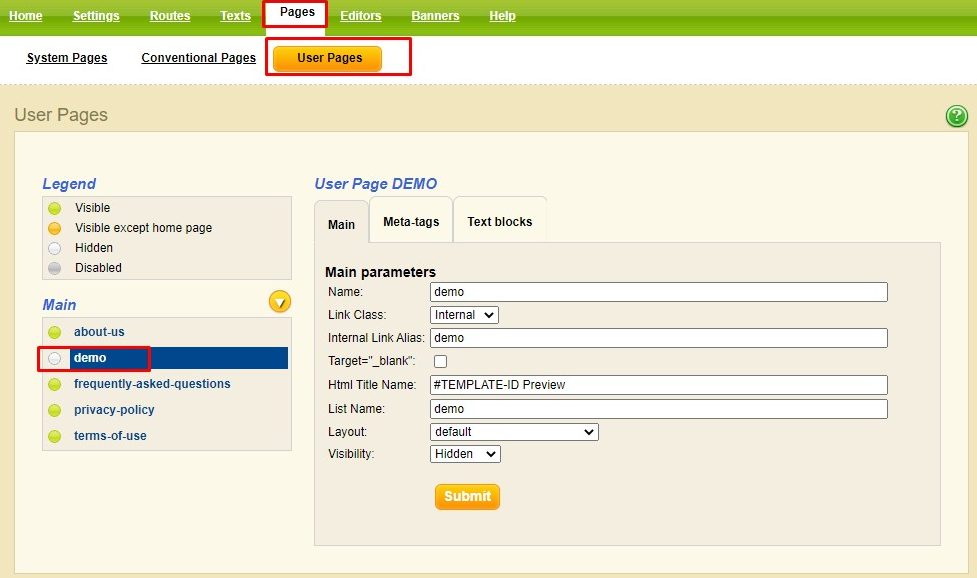
9 Add Demo page:
- Navigate to Pages -> User Pages and press the orange triangle on the left, then go to
- Add new page.
- Add “demo” to the Name field
- Set Internal for the Link Class field
- Add “demo” to the Internal Link Alias field
- Add “#TEMPLATE-ID Preview” to the HTML Title Name field
- Add “demo” to the List Name field
- Set default for the Layout field
- Set Hidden for the Visibility field
- Press Submit.
10 Add F.A.Q. page:
- Navigate to Pages -> User Pages and press the orange triangle on the left, then go to
- Add new page
- Add “frequently-asked-questions” to the Name field
- Set Internal for the Link Class field
- Add “frequently-asked-questions” to the Internal Link Alias field
- Add “frequently-asked-questions” to the HTML Title Name field
- Add “frequently-asked-questions” to the List Name field
- Set frequently-asked-questions for the Layout field
- Set visible for the Visibility field
- Press Submit.
11 Add Terms of Use page:
- Navigate to Pages -> User Pages and press the orange triangle on the left, then go to
- Add new page.
- Add “terms-of-use” to the Name field
- Set Internal for the Link Class field
- Add “terms-of-use” to the Internal Link Alias field
- Add “terms-of-use” to the HTML Title Name field
- Add “terms-of-use” to the List Name field
- Set terms-of-use for the Layout field
- Set visible for the Visibility field
- Press Submit.
12 Add Privacy Policy page:
- Navigate to Pages -> User Pages and press the orange triangle on the left, then go to
- Add new page.
- Add “privacy-policy” to the Name field
- Set Internal for the Link Class field
- Add “privacy-policy” to the Internal Link Alias field
- Add “privacy-policy” to the HTML Title Name field
- Add “privacy-policy” to the List Name field
- Set privacy-policy for the Layout field
- Set visible for the Visibility field
- Press Submit.
13 Add About Us page:
- Navigate to Pages -> User Pages and press the orange triangle on the left, then go to
- Add new page.
- Add “about-us” to the Name field
- Set Internal for the Link Class field
- Add “about-us” to the Internal Link Alias field
- Add “about-us” to the HTML Title Name field
- Add “about-us” to the List Name field
- Set about-us for the Layout field
- Set visible for the Visibility field
- Press Submit.
Page Demo is compulsory for any custom template shop. These three pages - F.A.Q., Terms of Use and About Us - are displayed in our theme’s main menu by default. You can customize them in “theme”/pages/ and you can change the layout of the main menu in file “layout.php”.
<img src="https://rms3.templates.com/install/images/pages.jpg" alt="" />
14 Add your own (custom) page. Check this video example of how to add custom page. The provided example shows old RMS theme, but the only difference is that it will not be added to the top menu automatically. You have to add the link to your new page in “layout.php” file.
15 Hide specific templates (optional):
- Go to Settings -> User settings and press Add New.
- Add “HIDE_TEMPLATES” to the Name field.
- Add “Hide templates, put numbers separated by comma” to the Description field.
- Add the ID's of the templates you would like to hide (separate them with comma) to the Value field.
- Click Submit.

16 Change WebStudio Header text (optional):
- Go to Texts -> Global Texts and press Add New.
- Add “WEBSTUDIO_HEADER_TEXT” to the Name field.
- Add “WEBSTUDIO_HEADER_TEXT” to the Title field.
- Add “Select a Template for Fast Website Setup” and press Submit.
17 Set Template Advantages text (optional):
- Go to Texts -> Global Texts and press Add New.
- Add TEMPLATE_ADVANTAGES to the Name field.
- Add By purchasing a template you get to the Title field.
- Add the below to the Title field (remove the spaces first):
<p>< ul class = " template-advantages " ></p>
<p>< li >A Professionally Designed Website< /li></p>
<p>< li >Technical Help and Support< /li></p>
<p>< li >Your Web Studio Advantages< /li></p>
<p>< li >Your Web Studio Advantages< /li></p>
<p>< li >Your Web Studio Advantages< /li></p>
<p></ ul ></p>
18 Add Privacy Page (optional):
- Navigate to Pages -> User Pages and press the orange triangle on the left, then go to Add new page.
- Add Privacy to the Name field
- Set Internal for the Link Class field
- Set terms-of-use for the Internal Link Alias field
- Set terms-of-use for the HTML Title Name field
- Set terms-of-use for the List Name field
- Set terms-of-use for the Layout field
- Set Visible for the Visibility field
- Press Submit.
19 Change Logo/favicon: to change the logo simply replace a logo.png and logo-white.png files in your /themes/theme-2018-v03-en/images/ folder. The same procedure with favicon: replace favicon.png file in your /themes/theme-2018-v03-en/images/ folder.
20 Change title of the site: Settings > User Settings, add your site’s meta title to the META_TITLE field and press the Update button.
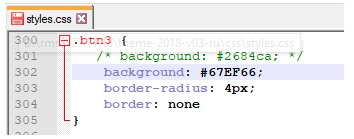
21 Change color scheme of your store: you need to have basic knowledge of HTML and CSS. The colors of all elements are indicated mostly in file styles.css, located in /themes/theme-2018-v03-en/css/ folder. And some style of the demo page elements are specified in demo.css file. The procedure is as follows:
1) inspect the element you would like to change color on page
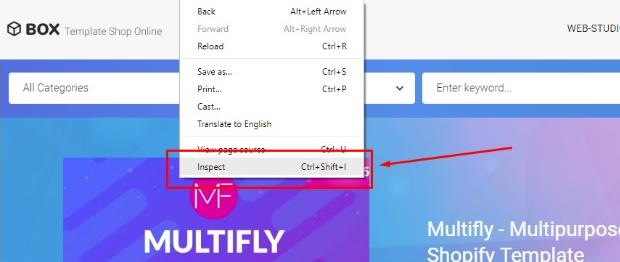
2) find the proper selector (in this case it is class .btn3), property (background) and value (#2684ca)

3) open the file (in this case - styles.css on line 300), find these properties there and change the value on any color you want. We recommend commenting the code you want to make changes to, so you will be able to discard changes quickly. Do not forget to save the file and upload it back to your server in case you are editing it locally.
4) Repeat the actions above till all of the elements are customized.
22 Speed up your store (optional): we recommend using CloudFlare service.
If you have affiliate questions or issues feel free to contact us.